Methods for upgrading clients
October 6, 2023About 1 minReferenceMethods for upgrading clients
Upgrade on the client
- After entering the super user, use the latest installation package installclient.exe to overwrite the installation. Do not uninstall and then install without restarting.
- After the super user is updated, use a USB flash drive to copy the latest version of c:\program files\iscsidisk\iSCSIInstall.exe out.
- For network pxe boot, just shut down the super user's machine, exit the super user on the server, and it will prompt to save the restore point.
- For local vhd offline boot, exit the super user and enter the normal user, the old version of the client will prompt to upload, upload the restore point.
Note: If the old version of the client fails to upload, you can try to use the new version of the client to upload. The replacement method is as follows:
- After entering a terminal with administrator privileges, first use the command "taskkill /F /IM iSCSIInstall.exe" to kill all client processes.
- Then replace it with the new version of the client that was copied out in the super user.
- Start the client background service "sc start iSCSIBoot"
- The client will prompt to upload again, and now you can use the latest version of the client to upload the restore point.
Upgrade on the server
- Select the image or restore point you want to update, right-click, and use the "Mount" command
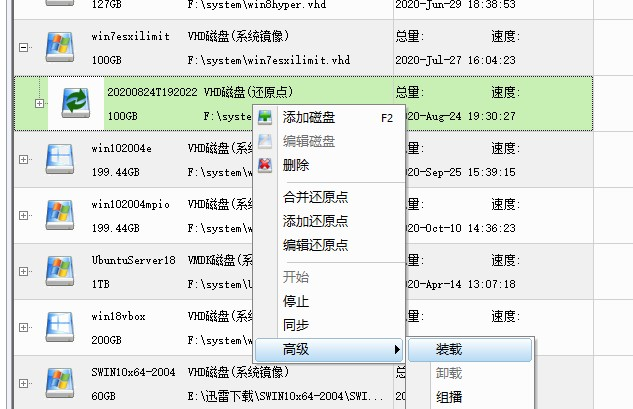
- After a while, a disk will open. If not, go to disk management and find it, add a drive letter
- Open the new disk and find E:\program files\iscsidisk\ client installation directory
- Copy the new version of iSCSIInstall.exe to this directory and close the file explorer
- Then unmount the disk in disk management.
- When prompted to save, create a restore point, and then test the client machine. Confirm that there is no problem before merging.